The pitching (HIGH approach to the green)
Pitching is a technique that terrorizes golfers with a high stroke index. Yet, this technique can be learned quickly if you pay attention to it. The pitch is part of the short game arsenal, along with the putt and the chip. It is therefore a very common golf shot and that can significantly reduce your score. Moreover, the pitch is often the only way to reach the green.
As you now know, you have to know how to walk (short game) before learning how to run (long game). And pitching bridges the gap between the short game and the long game, as it is a sort of mini-swing of the long game. In my opinion, you should devote most of your practice sessions to it and vary the distances that pitching allows you to reach easily.
What exactly is a pitch?
The pitch, or high approach to the green, is a low-intensity shot. The motion is similar to the one executed to ricochet flat stones across a body of water. It is like a sideways throw.
For a long moment, the ball flies through the air and then comes to rest quickly and with little roll on the green. Thus, the pitch allows you to fly over an obstacle, such as a bunker around the greens. The pitch is the link between the chip and the half-swing. In fact, if the distance to the green is too far for the chip, but too close for a half-swing, then the pitch is just right.
PITCHING with Wrist Cocking (HIGH approach with LITTLE ROLL)
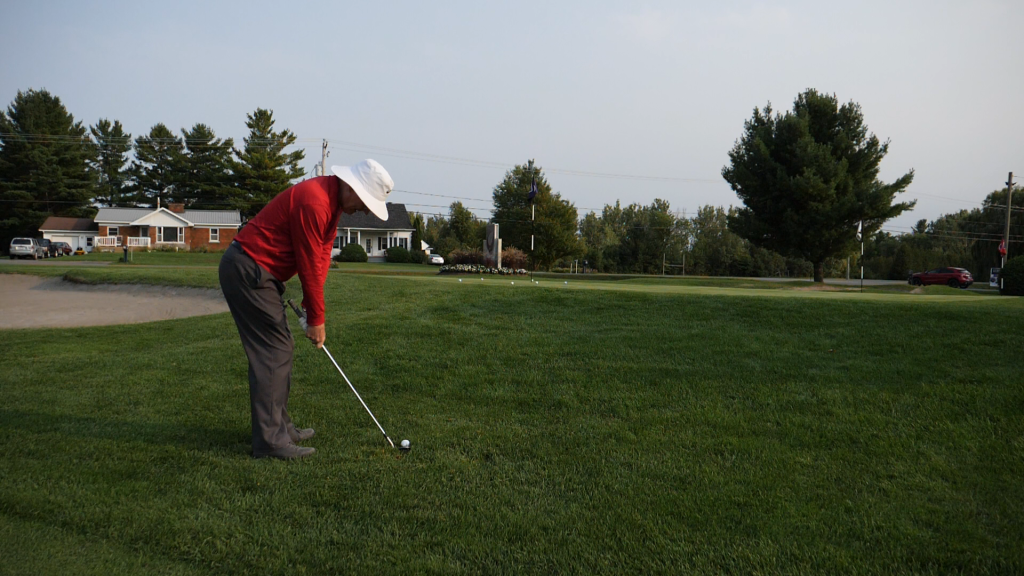
Pitch at address
The alignment of the feet: It is open, but less so than for the chip. In other words, the feet are aligned to the left of the target for right-handers. Forcibly, the feet are aligned to the right for left-handed people. The feet are slightly apart, but the blade is pointing at the target (it is square). Since the feet alignment is open, the pelvis alignment is also open.
The shoulder alignment: As for the shoulder alignment, it can be open or square. It is naturally open because of the open alignment of the pelvis and feet. Nevertheless, you can turn the shoulders so that they are parallel to the line of sight and, therefore, square.
The posture: The posture for the pitch is lower than the chip.
The position of the ball: The ball faces the lead breast (the left breast for right-handers). That said, move a little away from the ball to create a higher trajectory or, conversely, move closer to it for a lower trajectory.
The Grip: For pitching as for all techniques except putting, the grip is digital, meaning more in the fingers than in the palms of the hands. The grip is neutral or weak, that is, with the hands more or less facing the target on the handle.
The position of the hands: The hands are facing the ball, but you can move them slightly toward the target or in the opposite direction. The position of the hands relative to the ball at impact affects the height of this approach shot.
The weight distribution: The weight is more on the lead foot. There may be a little bit of weight transfer during the swing, especially for long pitches.
The pitch swing
The backswing: Turn the shoulders to execute the backswing by cocking the wrists to form an L with the lead wrist. At the top of the backswing, the hands are very low, but the blade is very high and points to the ball, not the sky.
The transition: The transition is the change in direction between the backswing and the forward swing. It is a crucial movement in golf, as it creates the space for the motion of the trail elbow toward the target. Without a transition, the trail elbow remains blocked by the body and the club blade remains open, resulting in a slice. The golfer will then attempt to avoid the slice by bringing the club face back to square with a sharply rotational movement of the forearms: a perilous and desperate maneuver. To make the tricky transition, move your trail shoulder toward your trail hip from the top of the backswing. As you do so, your belly will dig in to let your trail elbow pass.
The Forward Swing: During the forward swing, the hands follow-through the ball in a smooth, continuous motion. The hands do not stop at the ball, they continue toward the target until both arms are fully extended toward it.
The final position: In the final position, the belly button and torso face the target. The arms are fully extended and the wrists are disarmed. The trail heel is raised and facing the target. The trail knee hugs the lead knee. Hold the pose for feedback (feel the movement performed to memorize it, analyze and correct it).
Tips
- At address, turn the toes of the lead foot toward the target to facilitate rotation;
- Keep your hindquarters (buttocks) against an imaginary wall behind you so you don’t get up;
- Synchronized short game swing all in one block: arms, shoulders and hips rotate together throughout the swing;
- The lead arm is in full extension at the top of the backswing;
- From the top of the backswing, begin the downswing as if you were going to hit the ball with the butt end of the handle;
- Don’t cross your forearms during the downswing, as you want the blade to point skyward at the end for a less rolling ball on landing.
Other considerations for the pitch
The L to I Pitch: Many professionals advocate an “L to I” swing in which the forward swing is equal to the backswing. The wrists uncock very quickly due to the gravitational force.
The backspin: For a slight backspin, the blade should point to the sky in the final position. The backspin is most accentuated with quality balls like the ProV1. To accentuate backspin (underspin), turn into a “barrel” with no lateral movement and more speed with the body than with the arms or hands. When practicing on a driving range, pitch with the trail hand only.
Pitch Swing Plane: The swing plane (swing arc) is inside-out preferably, similar to a mini-draw. This swing plane allows you to minimize the risk of fat shots and maximize the use of wedge bounce.
The wedge bounce: The bounce is created by the sole of the wedges when you place their blade in the open position. Opening the blade increases the ‘loft’ of the blade and, therefore, the height of your pitch.
How to cock your wrists for pitching
To properly cock your wrists, you need to have the right grip. I explain it to you in the video below.
Improve Your Impact
Here’s a drill to do at home to improve the consistency of your impacts.
Drill: The Bumblebee
Like Jack Nicklaus, perform chips and pitches while whispering. The whisper should not cease or fluctuate in intensity, indicating that the swing is fluid and relaxed.
Drill: Pink Flamingo (Pitching on the lead foot)
Perform pitches with your trail foot on the tips of its toes so that almost all the weight is on your lead foot. Be sure to maintain your balance at all times. Before starting your swing, open your pelvis toward the target as in the impact position and brace your trail knee to your front knee. Do not restrict the shoulder turn. This drill helps you learn the impact position while improving your balance. By the way, balance is the most important skill for consistency in golf. Combine the two drills above for added effectiveness.
Short Pitch/Long Pitch
Short pitch and long pitch are easily practiced at home. See for yourself these two pitches in slow motion. Notice that, with the same tempo but different swing length, I produce both types of pitch: long and short.
Short and long pitch advice
For a short pitch of about 40 yards, don’t engage the pelvic rotation on the backswing, but engage it on the front swing.
For a long pitch of more than 40 yards, engage pelvic rotation on both the backswing and the front swing. Use weight transfer between the legs to increase power and, therefore, distance.
Distance Control: Tom Watson prefers to control distance through pitch height rather than the somewhat unpredictable backspin (underspin). To do this, use different sticks (different blade angles).
Keep your nose on the ball
Drill: Finish with reverse lead wrist
Perform pitches with the lead wrist highly arched rather than flexed at the finish position. On finish, the arched lead wrist produces a very low blade relative to the hands. This drill teaches you how to hit the ball without scooping, pulling on the handle instead of pushing on it with the trail hand.
Drill: One-handed Finishing (the lead hand)
Perform pitches by letting the trail hand release the handle after impact. This Drill promotes a descent impact and weight transfer (regaining support) and combats early body (head) lift on descent.
Drill: Two tees 10 cm apart
Poke two tees in the ground almost to their heads, 10 cm apart (4 inches) on the line of sight. Set up in a golf stance with the lead breast facing the trail tee. In one swing, dig out both tees to learn to brush the ground at the right spot (between the lead breast and the front armpit). You can replace the trail tee with a golf ball.
Drill: Step Forward “à la” Gary Player
During the follow-through, take a step toward the target with the trail foot after pushing off on that foot on the way down.


