The half swing: Throw darts on the green!
Finally the half swing, you might say! Now you’ll be able to approach the green from the fairway with any club. However, before you switch to the half swing, make sure you have mastered the shorter swings: putt, chip and pitch. If you don’t, you’re headed for disaster, because all the bad bends that go uncorrected will become bad habits that will cause you to plateau. You’ll be trapped in the rut you’ve created by skipping steps.
Devote 80% of your practice time to the short game: putt, chip and pitch. And pay particular attention to the pitch, and especially the long pitch, because it is this technique that will slowly but surely lead you to the half swing. You will see: the quality of your short game will be reflected in your half swing and your long game.
What exactly is a Half Swing?
The half swing is a long game swing of medium intensity and that sends the ball directly to the green, where it should come to rest.
The length of the backswing of a half swing
Strictly speaking, the backswing of a half swing should stop at the point where the lead arm is parallel to the ground. This is what I call the L to L Half Swing, which I explain more fully later in this article.
However, you can lengthen the half swing and consider it a shortened version of the full swing. In other words, turn your pelvis and shoulders generously, allowing the lead arm to extend beyond parallel to the ground, but without forcing the note. Stop your backswing as soon as you feel too stretched or about to lose your balance.
You lack balance? Follow the recommendations that I outline in another article.
Do you lack flexibility? Do, in the comfort of your own home, the easy exercises that I recommend. Also, do the Shy Pink Flamingo exercise, below, as a warm-up before a round of golf.
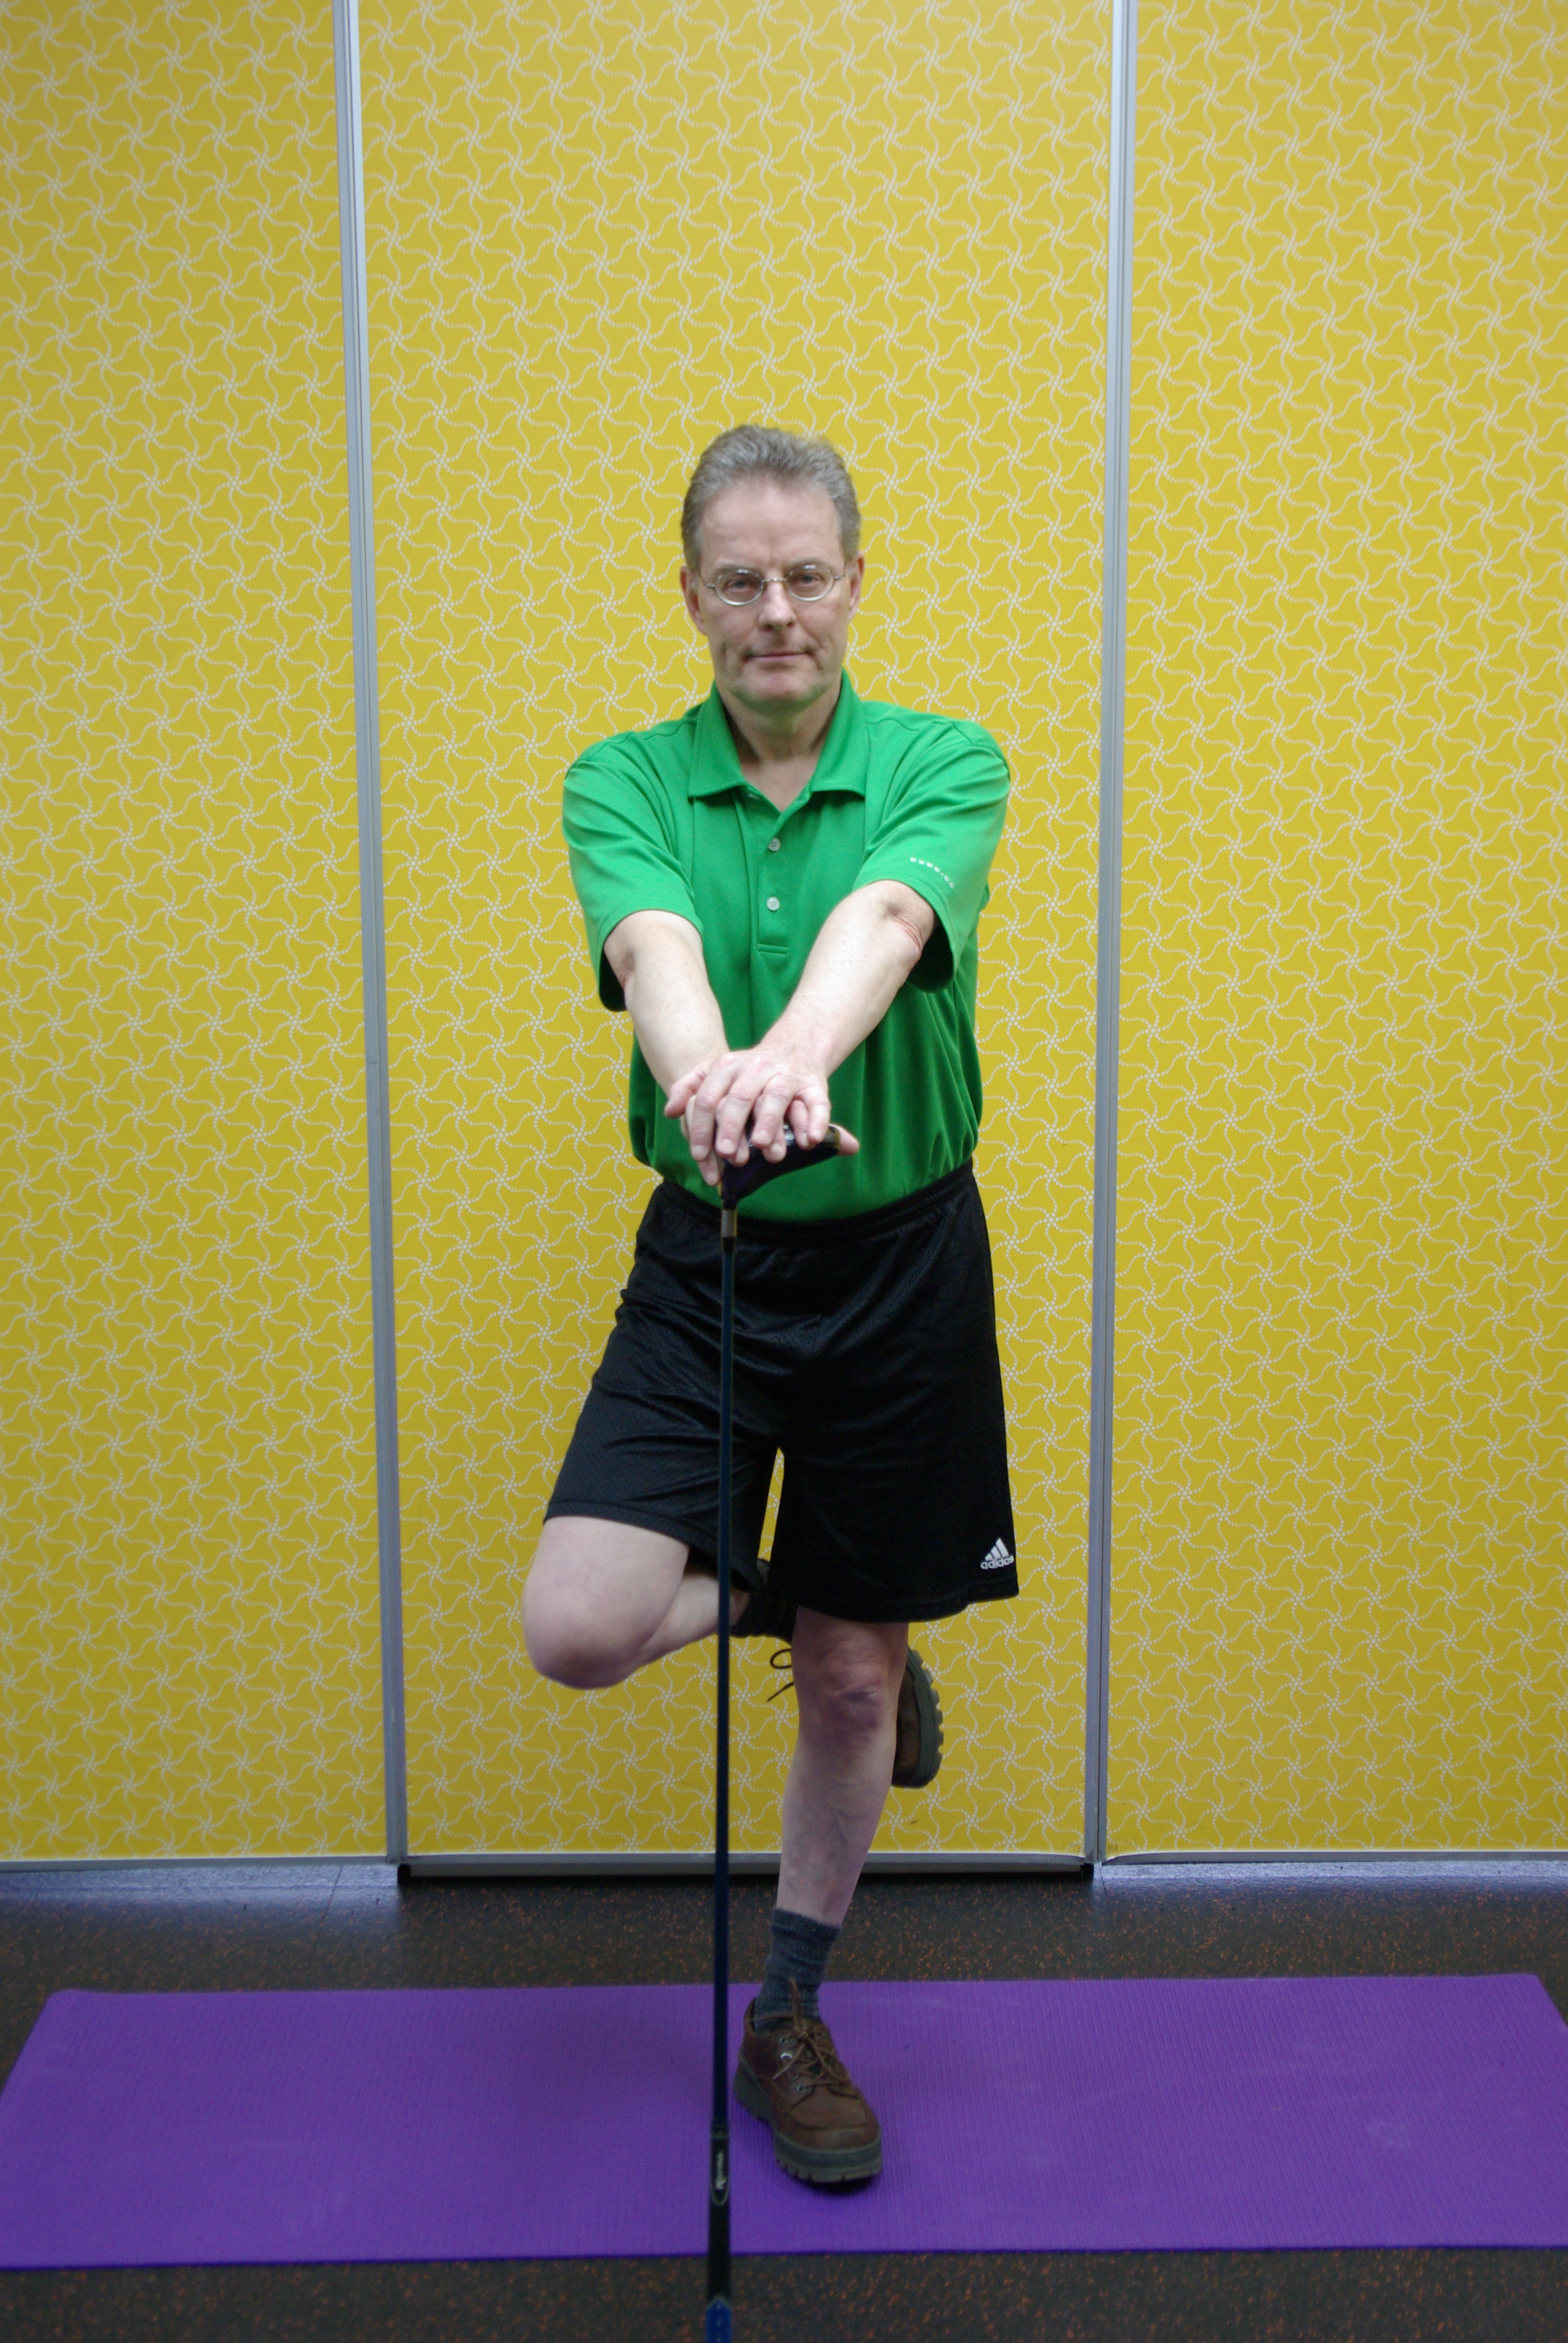
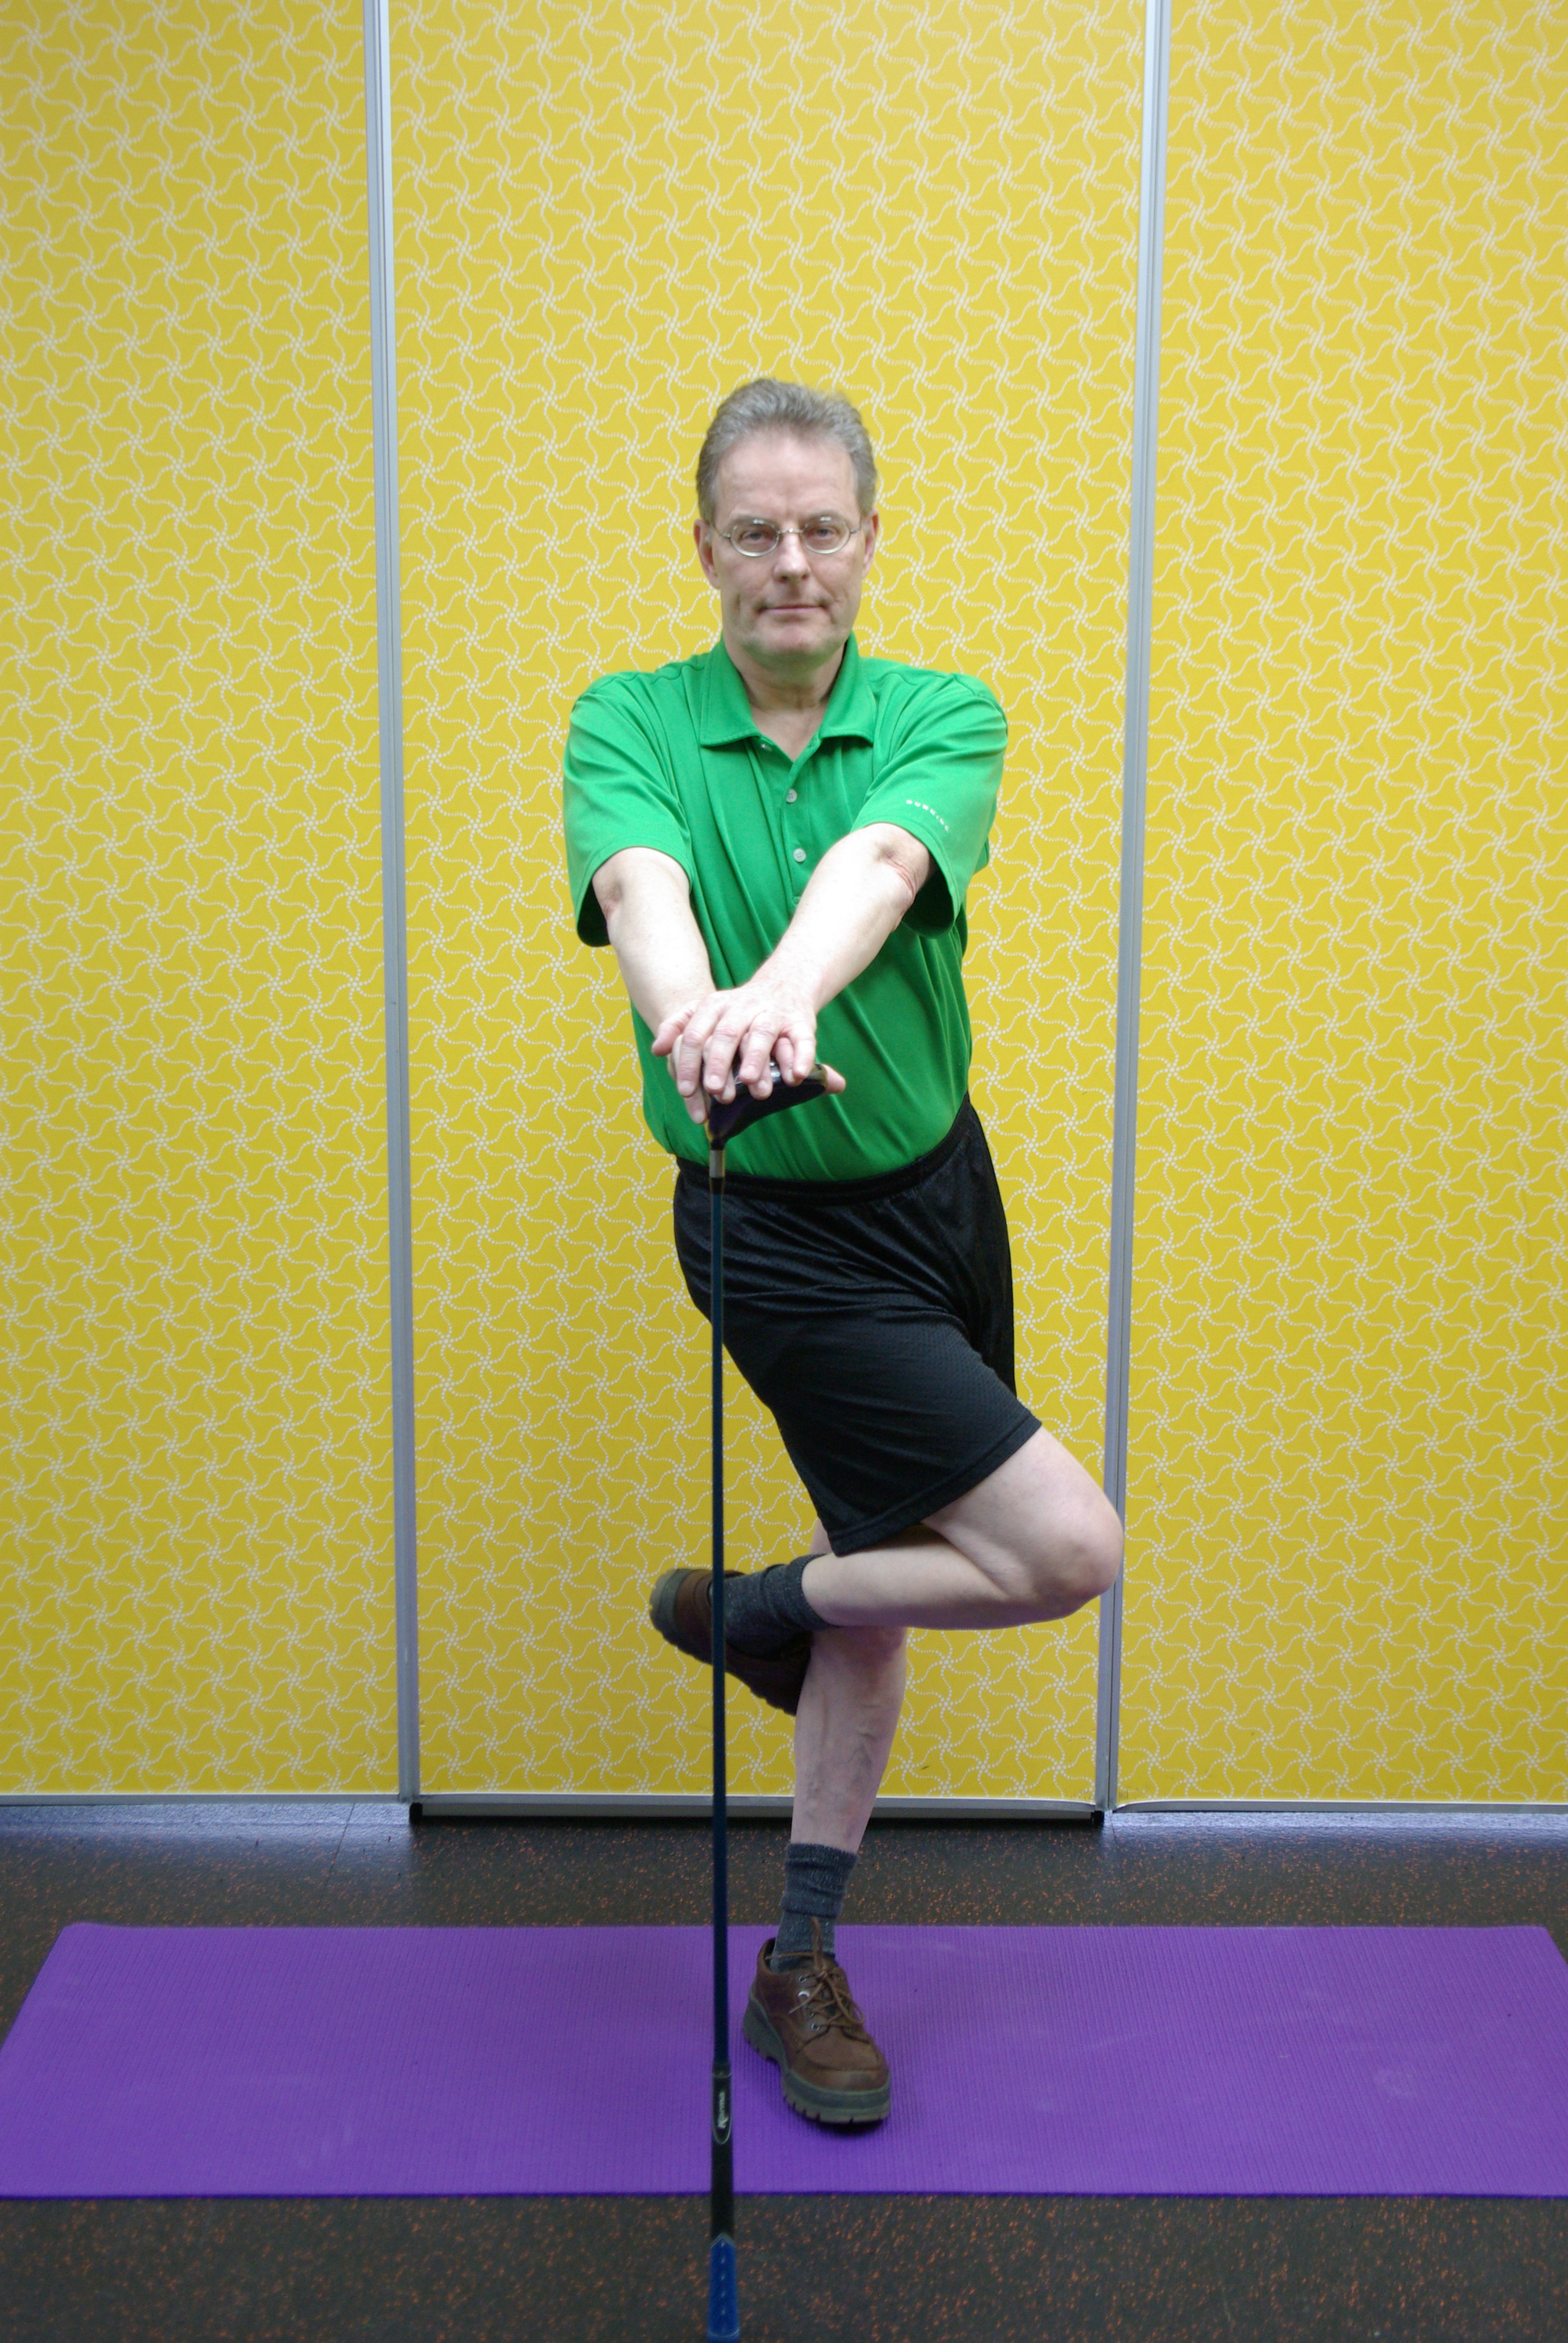
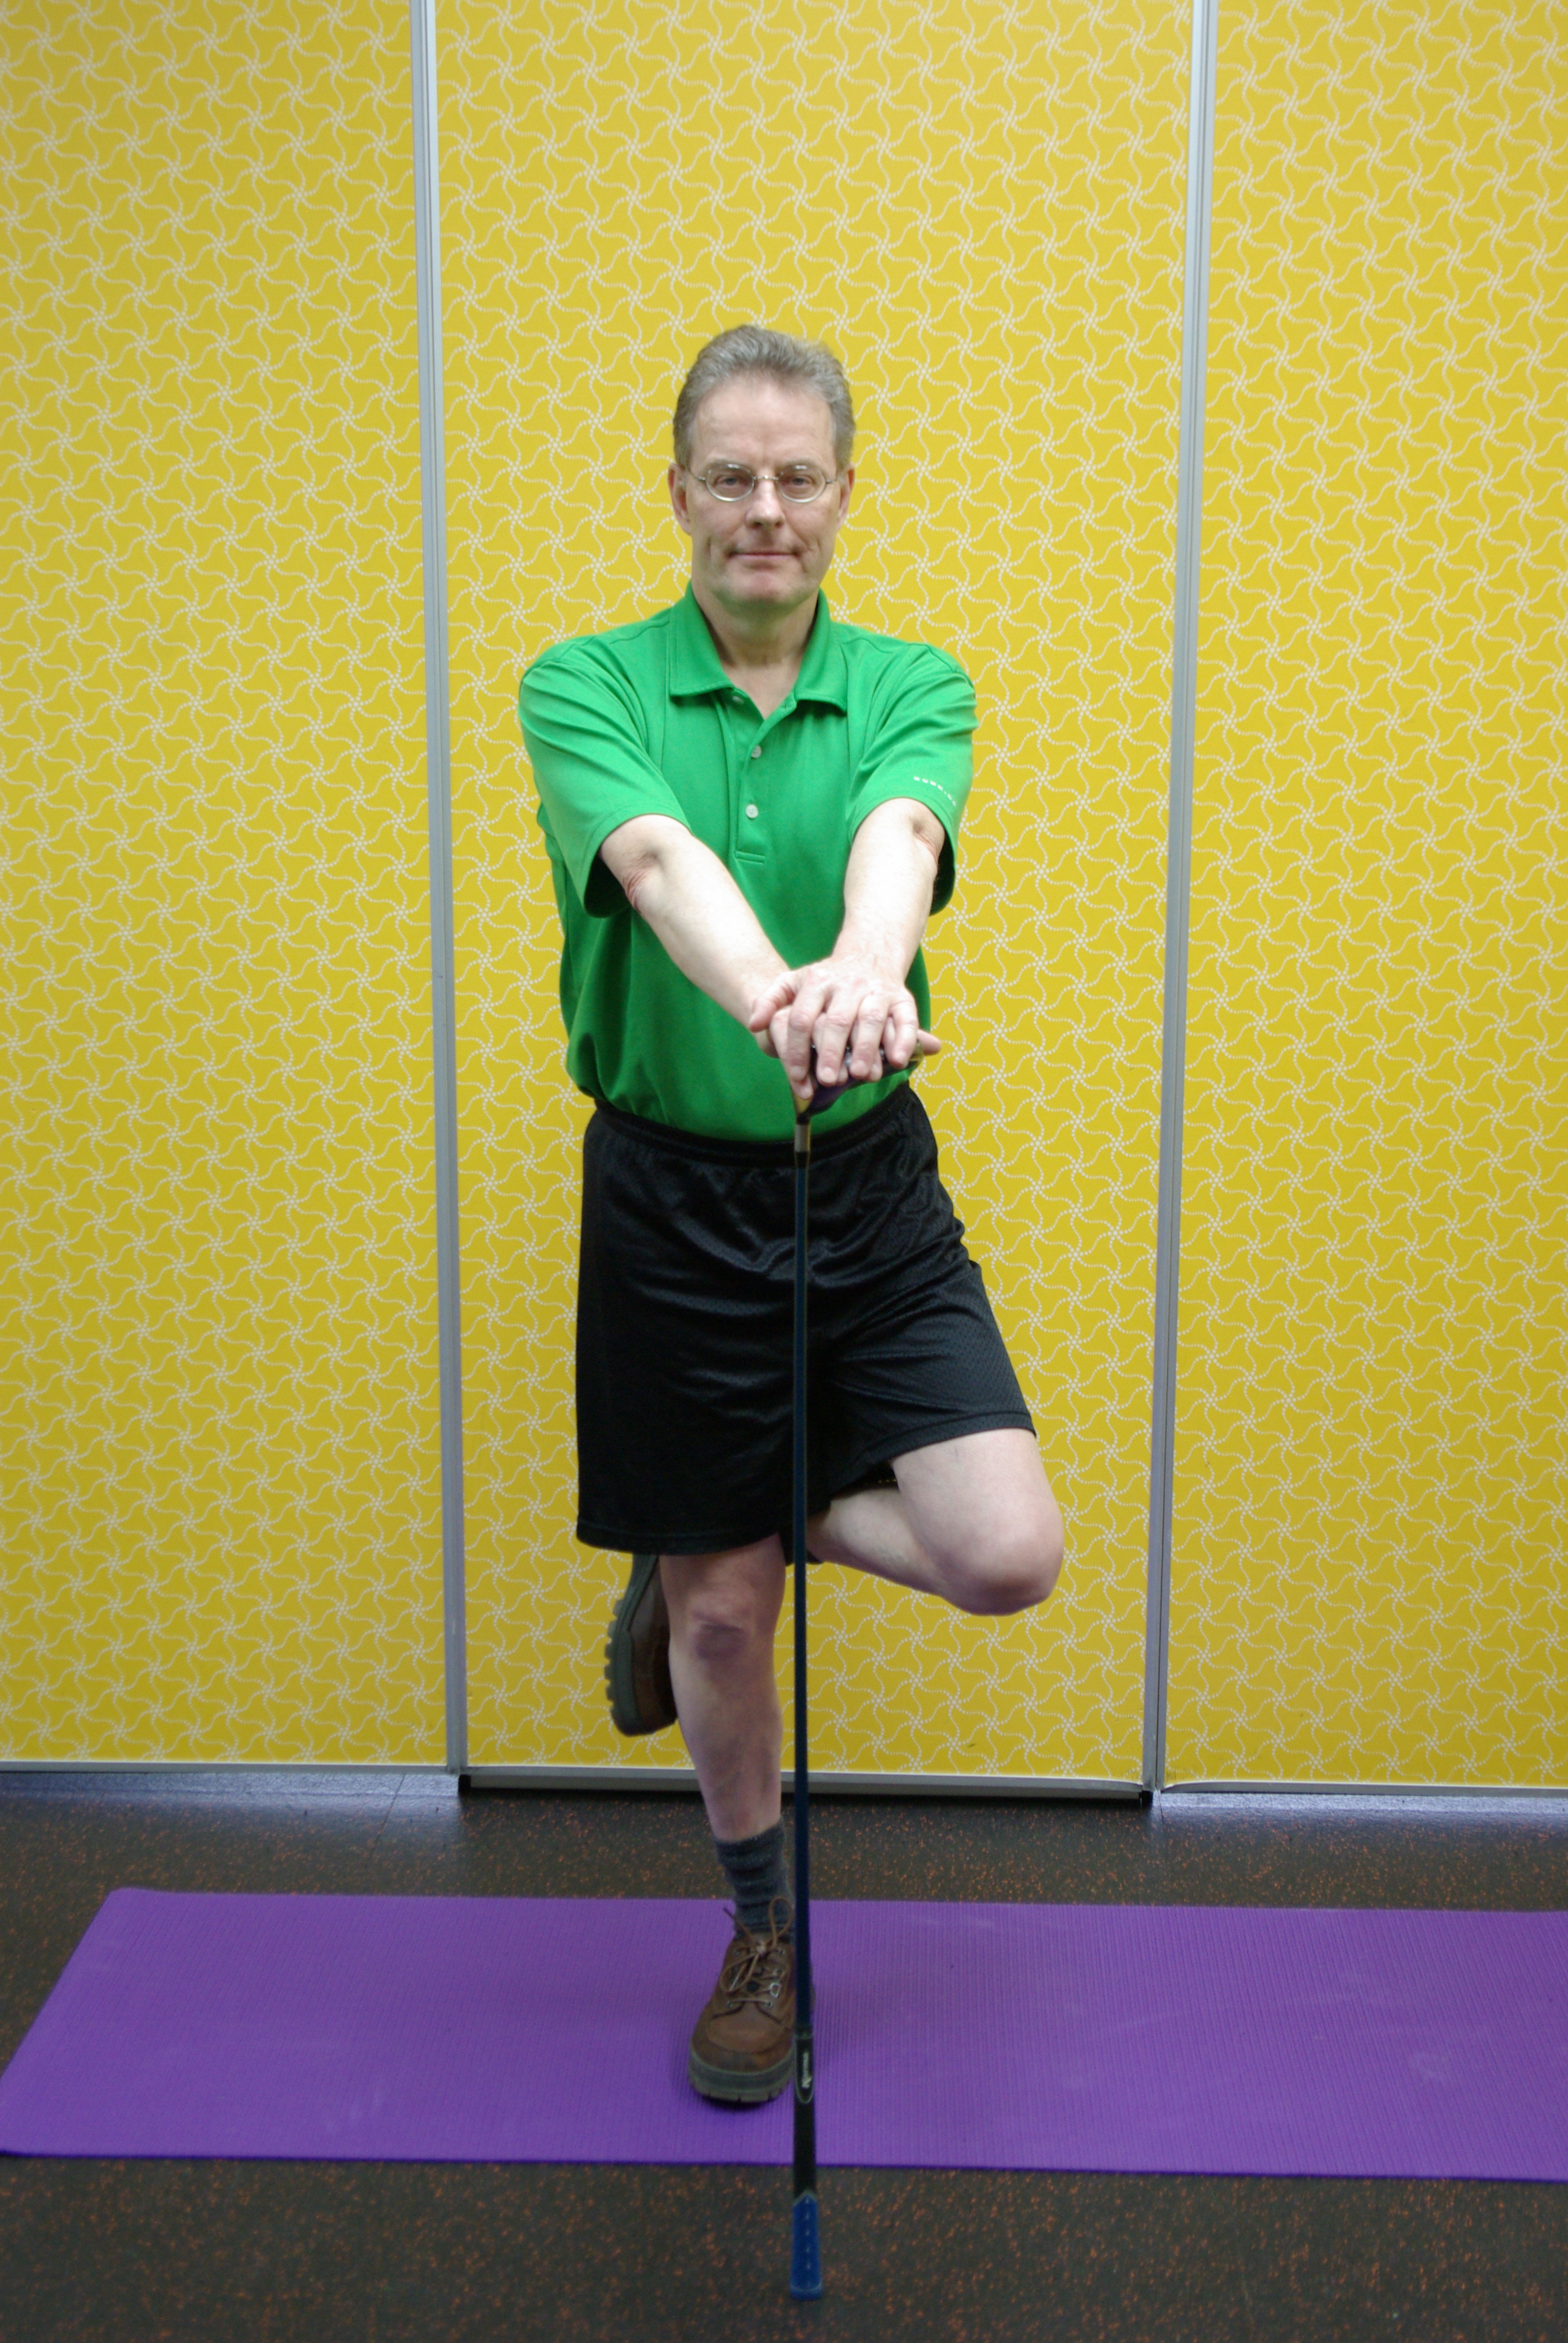
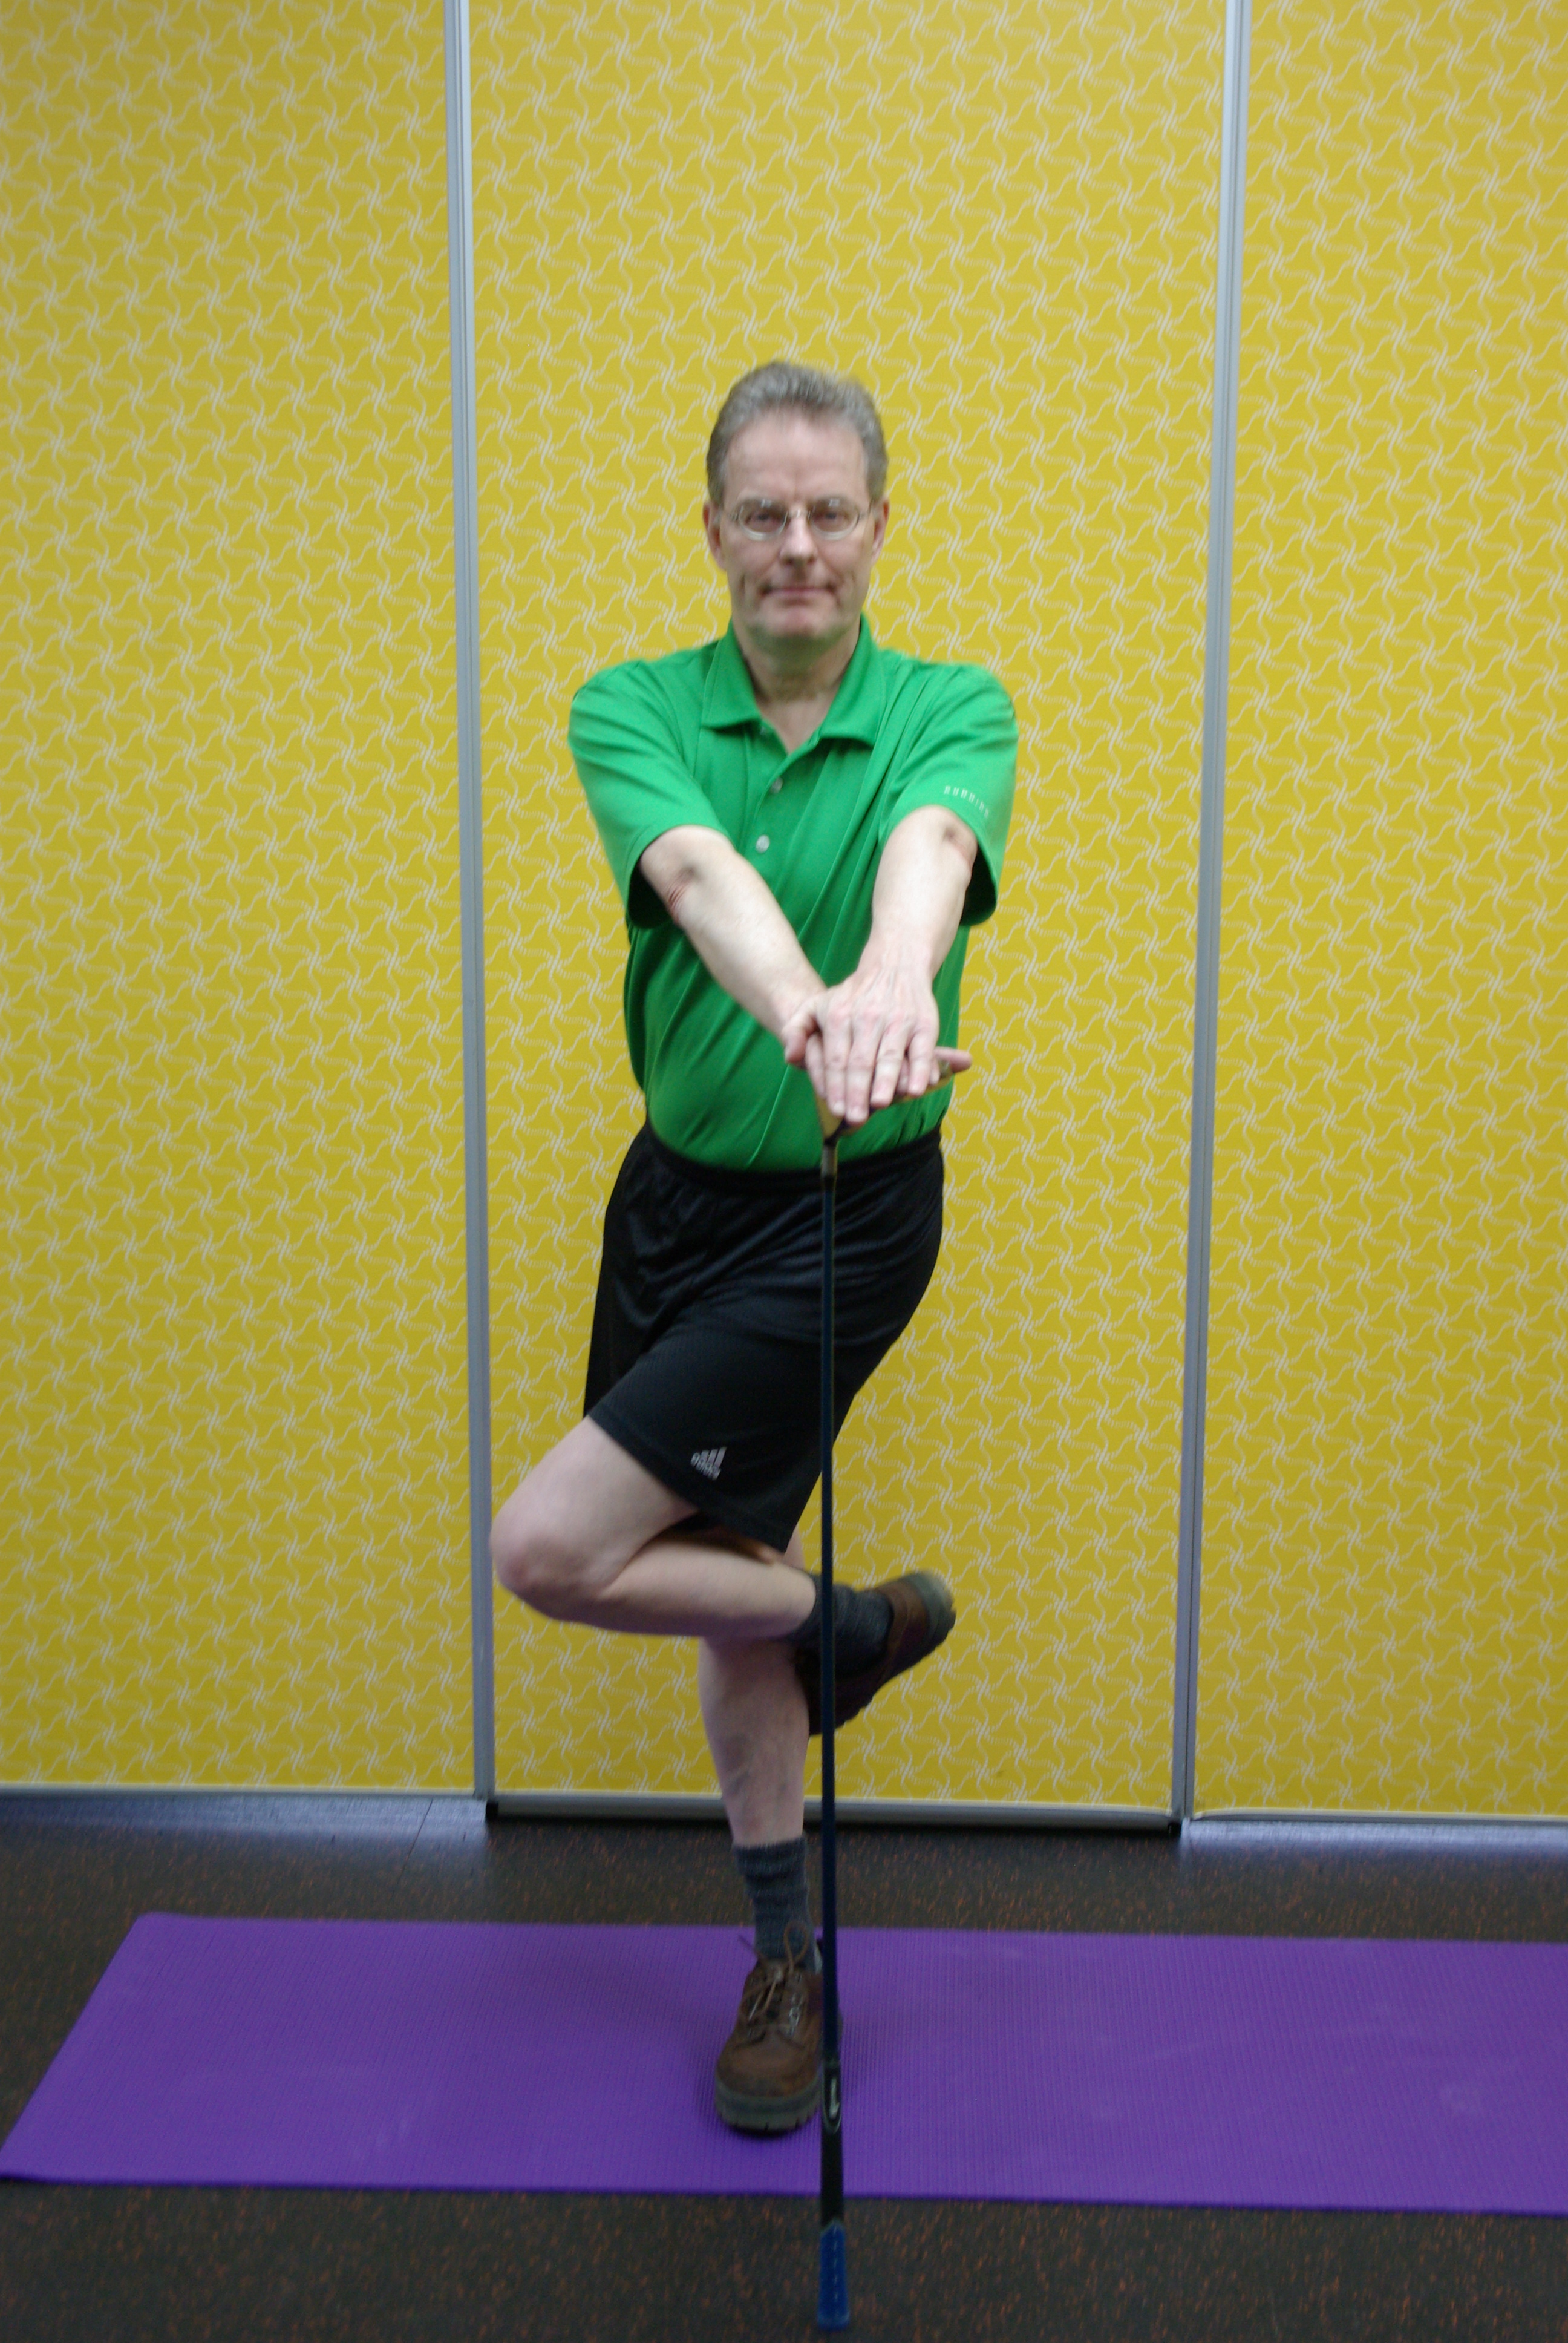
The Shy Pink Flamingo: better balance and more flexibility in one exercise!
With one foot behind the opposite knee, do hip rotations without turning your shoulders. You can support your upper body with an inverted wood. If your balance is good, hold the club horizontally in front of you at chest height and do the pelvic rotations without moving the torso or the club. The foot on the ground should remain planted without wobbling. This exercise will quickly improve your balance and, therefore, the consistency of your golf shots.
The L to L Half Swing
The Foundation before technique
Before trying to fix a movement, many golfers benefit from clarifying what belongs to the mind, the body, and the motion itself.
That is exactly the role of The Socle – The Golfer’s mental and physical Foundation.
A necessary first step, calmly established, to put things back in the right order before any technical work.
[pms-restrict subscription_plans=”4862″]
Key points of the address setup for the half swing
- Choose a target, such as a specific spot on the green;
- Find an intermediate target about three feet in front of the ball;
- Align the blade “square” (perpendicular to the intermediate target) with the trail hand;
- Spread the feet about shoulder width apart;
- Open the lead foot about 15 degrees toward the target;
- Distribute your weight equally on both feet;
- Take the inverted K stance (for right-handed people, but non-inverted K for left-handed people);
- Grab the handle with a digital grip;
- The ball should face your lead breast (the left one for right-handers).
The routine for setting up correctly at address
To set up correctly at address, follow the steps below.
1. Alignment
2. Posture
3. Grip
4. Ball position
5. Stance (stability)
Half swing
- Make your backswing by turning your shoulders and cocking your wrists;
- Stop your backswing when your lead arm is parallel to the ground and your 2 thumbs are pointing to the sky;
- Make sure your wrists are cocked as much as possible: the L forms a 90-degree angle between the lead arm and the club shaft;
- Your weight should then be mostly on the inside of the trail foot;
- Your gluteal muscles, especially the one on the trail side, should be contracted;
- Shift your weight back on the lead foot by doing the Transition move described below;
- Begin the downward motion by bringing the belly button toward the target;
- Follow-through the ball by unfolding the trail arm and letting the rotation of the body propel the hands toward the target;
- Finish in an L or I toward the target, forearms crossed, trail arm parallel to the ground, trail foot on the tips of its toes, lead glute muscle contracted.
- You can even make a longer finish by letting the club shaft rest on your front shoulder, both elbows bent.
Cautionary note: The frozen finish is a must
What’s the point of going to all this trouble if you don’t get anything out of it with every swing? If you are unconsciously repeating the same mistakes? In order to correct your mistakes, you need to stop at the end of the swing and perform a diagnostic while your feel is still fresh.
Drill: Clipping Several Broken Tees in a Row
Line up five or more broken tees spaced approximately 6” apart perpendicular to the target line, followed by 3 to 5 balls equally spaced. Set up in front of the leftmost tee (for a right-hander) as if it were a ball and clip it with a “Willy” type half swing ( no technical thoughts). Clip all the tees with a minimum of interruption between them, forming a good divot (piece of grass torn off by the blade) in front of them and continue with the balls. Use any club, preferably a short or medium iron.
Lower the tees flush to the ground up to their heads for the exercise to be even more beneficial.
This drill lets you instinctively learn where the zero point is (the lowest point in front of the ball) and hit the “sweet spot” consistently with a down strike. If you have trouble making a divot or your swing is too vertical (you dig), place a second row of broken tees about 4 inches in front of the first row and clip both tees on the same target line with a single swing.
On a mat, replace broken tees with an iron placed about 8 to 12 inches perpendicular to the target line and behind the ball. Hit balls while avoiding this iron, which favors a downward strike.
On a mat, you can also place the ball in the hole where the rubber tee is normally located (which you will have removed).
Drill: Iron against the shoulders
- With your arms crossed, hold an iron against your shoulders;
- Press your tailbone against a post or wall corner, assuming the address setup (torso bent from the hips);
- Very slowly rotate your shoulders to each side, making sure to point each end of the iron toward the ground about 36 inches (1 meter) from your feet;
- To successfully maintain the torso angle at address setup, you must bend your waist to either side (lateral bending);
- At all times, you must maintain contact with the pole or wall corner:
- at address setup, the contact is against the tailbone;
- at the top of the backswing, the contact is against the trail buttock;
- at the impact position, the contact is again against the coccyx;
- at the finish of the swing, the contact is against the lead buttock.
The transition move in golf
The transition is the change in direction between the backswing and the forward swing. It is a crucial motion in golf because it creates the space for the motion of the trail elbow to the target. Without a transition, the trail elbow remains blocked by the body and the club blade remains open, resulting in a slice. The golfer will then attempt to avoid the slice by bringing the club face back to square with a sharp forearm rotation: a perilous and desperate maneuver that will send the ball anywhere but the target.
To make the tricky transition, move your trail shoulder closer to your trail hip from the top of the backswing. As you do so, your belly will dig in to let your trail elbow pass.
Exercise: Elvis Presley-style transition
With a club, at the driving range: At the top of a half backswing, turn your pelvis toward the target without lowering your hands. You can rest the club shaft on your trail shoulder to keep it there while you turn your pelvis toward the target.
Without a club, at home: Press both hands against a wall and turn your pelvis to both sides.
Drill: Half swing with feet together
Like Phil Mickelson, do half swings with your feet together at the beginning of your pre-shot routine to feel the weight of the blade and to let your arms fall with gravity.
Like Lee Westwood at the driving range, hit many half swing balls with your feet together, making sure to follow-through the ball with the trail shoulder. Gradually increase the power by spacing the feet and lengthening the backswing while making sure to transfer weight to the lead foot from the top of the backswing, but without forcing the downswing.
If there is no green, aim for a specific spot on the driving range. There is no point in hitting balls in bursts without aiming for a specific spot.
Drill: Three push-ups with wrists cocked
To combat the urge to throw your arms against the ball too soon, do a backswing followed by three successive partial downs. In other words, instead, throw the end of the handle toward the ball by bringing the sternum back to face the ball, but stop the downswing when the handle gets in front of the ball. This keeps the wrists fully cocked. Come back up to the top of the backswing at least twice before hitting the ball and continuing the forward swing to the finish.
Take note that the three backswings are done by turning the back to the target while raising the arms slightly and that the wrists remain cocked all the time, except for the last downswing followed by the strike. Do this drill slowly.
Good practice!
[/pms-restrict]